Table of Contents
- Introduction to Ultrasonic Testing
- Principles of Ultrasonic Testing
- Equipment Required
- Preparation for Testing
- Steps in Ultrasonic Testing
- Interpretation of Results
- Applications of Ultrasonic Testing
- Safety Measures
- Conclusion
- FAQs
Introduction to Ultrasonic Testing
What is ultrasonic testing? Diving into the intricate depths of materials, ultrasonic testing emerges as a beacon of precision and safety across diverse industries. Imagine a technique so powerful it can peer into the very heart of materials, finding hidden flaws without causing damage.
From the meticulous scrutiny of manufacturing processes to safeguarding the soaring heights of aircraft engineering, ultrasonic testing stands as a guardian of quality and integrity. With its unwavering accuracy and adaptability, ultrasonic testing emerges not just as a tool, but as a cornerstone of reliability, fortifying the very infrastructure we depend on.
Principles of Ultrasonic Testing
Ultrasonic testing uses sound wave propagation to detect material property changes or flaws. Technicians analyze echoes and signals to determine defects’ size, shape, and location within the material. Let’s discuss the principles of ultrasonic testing.
Generation of Ultrasonic Waves

Ultrasonic waves are typically generated using piezoelectric transducers. These transducers convert electrical energy into mechanical vibrations, producing sound waves with frequencies ranging from 0.1 to 15 MHz.
Propagation and Interaction with Materials
Once generated, ultrasonic waves propagate through the material being tested. They interact with internal defects, boundaries between materials, and other discontinuities, causing reflections and scattering.
Reception and Analysis
Either the same transducer or a different receiving transducer detects the reflected waves. The amplitude and time of flight of these echoes are analyzed to determine the size, location, and nature of any defects present within the material.
Equipment Required
To conduct ultrasonic testing effectively, several key pieces of equipment are essential. These include ultrasound transducers, which generate and receive sound waves, couplant materials to facilitate the transmission of waves between the transducer and the test piece, and an ultrasonic flaw detector to process and analyze the received signals. To conduct ultrasonic testing effectively, equipment is essential. Let’s explore more about it.
1. Ultrasound Transducers: These devices are responsible for generating and receiving ultrasonic waves. Ultrasound transducers convert electrical energy into mechanical vibrations, producing high-frequency sound waves that penetrate the material being tested. Sensor Networks Ultrasonic transducers can be used for this purpose across various industries.
2. Couplant Materials: Couplant materials are necessary to facilitate the transmission of ultrasonic waves between the transducer and the test piece. These materials help to minimize the loss of energy as the waves travel through them, ensuring accurate and reliable results.
3. Ultrasonic Flaw Detector: The transducer uses an ultrasonic flaw detector to process and examine the signals it receives. This device displays the amplitude and time-of-flight of the echoes, allowing technicians to identify and characterize any defects present in the material. Explore our flaw detectors here: Flaw Detectors
4. Calibration Blocks: Calibration blocks are used to verify the accuracy and performance of the ultrasonic testing equipment. These blocks contain artificial defects of known size and location, allowing technicians to calibrate the system and ensure reliable measurements.
5. Probe Holders and Scanning Systems: Probe holders and scanning systems are sometimes used to position the transducer accurately and maintain consistent contact with the test piece during inspection. These accessories help to ensure uniform coverage and reliable detection of defects.
6. Data Recording and Analysis Software: Advanced ultrasonic testing systems may include data recording and analysis software, allowing technicians to store, analyze, and interpret test results digitally. This software enhances efficiency and accuracy by providing tools for data visualization, defect sizing, and reporting.
7. Portable Hardness Tester: The Portable Hardness Tester, developed by NewSonic, stands out as a testament to technology and innovation in the field of hardness testing. One of the key highlights of the SonoDur3 is its use of UCI technology, which enables accurate and efficient hardness measurements on a wide range of materials, including metals, plastics, and ceramics. This technology uses high-frequency sound waves to assess the hardness of a material by measuring the impedance at the contact point between the indenter and the surface.
By utilizing these essential pieces of equipment, technicians can perform ultrasonic testing with precision and confidence, ensuring the integrity and reliability of critical components and structures across various industries.
For all your ultrasonic testing equipment needs, we’ve got you covered with precision-engineered solutions designed to enhance efficiency and ensure utmost reliability in every inspection task.
With a commitment to innovation and customer satisfaction, NDT Products stands at the forefront of the NDT industry, offering not just products, but the best solutions tailored to meet the unique requirements of each client. From state-of-the-art equipment to expert technical support and training, we empower our customers to achieve superior results and maintain the highest standards of safety and quality assurance. Trust NDT Products for all your non-destructive testing needs and experience unparalleled performance, durability, and peace of mind with every inspection.
Preparation for Testing
Before initiating the testing process, proper preparation is necessary to ensure accurate results. This involves thoroughly cleaning the surface of the test piece to remove any debris or contaminants that could interfere with the transmission of sound waves. Additionally, technicians must select the appropriate transducer and frequency based on the material being tested and the size of potential defects.
Once the testing equipment is set up and calibrated, technicians should also establish a proper scanning pattern to ensure thorough coverage of the test piece. It is important to follow all safety protocols and guidelines to prevent any accidents or injuries during the testing process.
Steps in Ultrasonic Testing
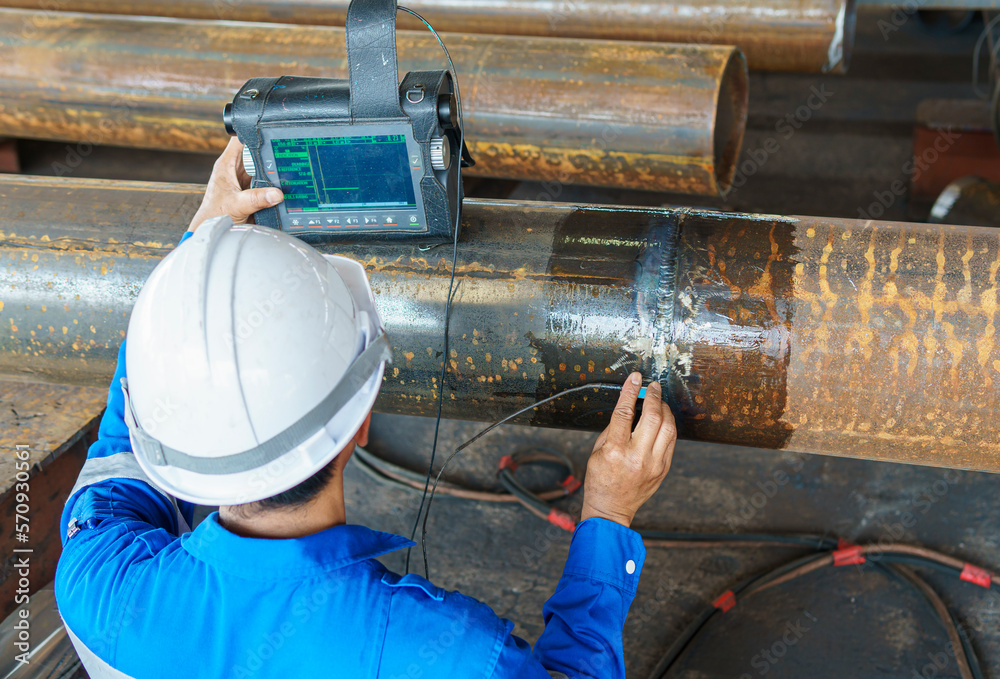
UT testing can be performed using either contact or immersion methods, depending on the nature of the material and the specific requirements of the inspection. During the testing process, technicians move the transducer systematically across the surface of the material, emitting sound waves and recording the echoes reflected back from internal features.
UT inspections can be performed using either contact or immersion methods, depending on the nature of the material and the specific requirements of the inspection. Here are the detailed steps involved in conducting ultrasonic testing.
1. Preparation
- Ensure that the testing area is clean and free from any contaminants that could interfere with the accuracy of the inspection.
- Verify that all necessary equipment, including ultrasound transducers, couplant materials, and flaw detectors, is calibrated and functioning properly.
- Select the appropriate testing method (contact or immersion) based on the material properties and inspection requirements.
2. Setup
- Position the ultrasound transducer in direct contact with the surface of the material being tested or immerse it in a coupling medium, such as water or oil, for immersion testing.
- Apply a thin layer of couplant material to the surface of the material to improve the transmission of ultrasonic waves and ensure adequate acoustic coupling between the transducer and the test piece.
3. Calibration
- Perform calibration checks using calibration blocks with known defects of various sizes and orientations.
- Adjust the ultrasonic flaw detector settings to ensure accurate measurement of defect size, amplitude, and distance.
4. Scanning
- Systematically move the transducer across the surface of the material in a grid pattern, ensuring complete coverage of the area of interest.
- Emit ultrasonic waves from the transducer into the material and record the echoes reflected back from internal features, such as defects, boundaries, and interfaces.
- Maintain consistent contact between the transducer and the test piece to ensure reliable signal transmission and reception.
4. Data Analysis
- Monitor the ultrasonic flaw detector display for indications of defects, such as amplitude peaks, signal attenuation, or changes in time-of-flight.
- Analyze the recorded signals to determine the size, location, and orientation of any detected defects.
- Use signal processing techniques, such as gain adjustment, filtering, and signal averaging, to enhance the clarity and accuracy of defect detection.
5. Documentation
- Record all inspection parameters, including transducer position, scanning speed, and flaw detector settings.
- Document the location and characteristics of any detected defects, including size, shape, orientation, and severity.
- Generate a comprehensive inspection report summarizing the findings and recommendations for further action, such as repair or further evaluation.
6. Post-Inspection Evaluation
- Review the inspection results and compare them to acceptance criteria or industry standards to determine the suitability of the material for its intended application.
- Identify any areas of concern or potential defects that may require further investigation or remediation.
- Implement any necessary corrective actions or preventive measures to ensure the integrity and safety of the inspected material.
By following these detailed steps, technicians can perform ultrasonic testing accurately and effectively, enabling the detection and characterization of internal flaws and defects in a wide range of materials and components.
Interpretation of Results
Once the testing is complete, the collected data is analyzed to identify any indications of flaws in the material. Technicians assess the details of the received signals to determine the presence, size, and location of defects. Common indications include echoes from cracks, voids, inclusions, or other discontinuities.
Applications of Ultrasonic Testing
Ultrasonic testing finds widespread applications across various industries, including aerospace, oil and gas, automotive, and manufacturing. In the aerospace industry, for instance, it is used to inspect critical components such as aircraft engines, wings, and structural elements for hidden defects that could compromise safety or performance. Here are five industries where ultrasonic testing is widely used.
- Aerospace: Ultrasonic testing is crucial for inspecting aircraft engines, wings, and structural components to detect hidden defects that could compromise safety or performance.
- Oil and Gas: In the oil and gas industry, ultrasonic testing is employed to assess the integrity of pipelines, storage tanks, and pressure vessels, helping to prevent catastrophic failures caused by flaws like corrosion or weld defects.
- Automotive: Ultrasonic testing is utilized in the automotive sector for quality control during manufacturing processes, enabling the detection of defects in components such as engine blocks, cylinder heads, and chassis to ensure the production of reliable and safe vehicles.
- Manufacturing: In manufacturing, ultrasonic testing is used to inspect welds, castings, forgings, and other fabricated components, helping to identify defects early in the production cycle to minimize rework and optimize efficiency.
- Power Generation: Ultrasonic testing is also applied in the power generation industry to assess the integrity of critical components such as turbine blades, boilers, and heat exchangers, ensuring the reliability and safety of power plants.
Safety Measures for Ultrasonic Testing
Safety is paramount when conducting ultrasonic testing, as it involves the use of high-frequency sound waves and electrical equipment. Technicians must adhere to strict safety protocols to minimize the risk of accidents or injuries, ensuring both their own safety and the safety of others in the vicinity.
1. Personal Protective Equipment (PPE)
Technicians should wear appropriate PPE, including safety goggles, gloves, and hearing protection, to shield themselves from potential hazards such as flying debris, electrical shocks, and excessive noise levels.
2. Training and Certification
Technicians must undergo thorough training and certification in ultrasonic testing procedures to ensure competency and proficiency in operating testing equipment safely. Regular refresher courses should be attended to stay updated on best practices and safety guidelines.
3. Equipment Inspection and Maintenance
Regular inspection and maintenance of ultrasonic testing equipment are essential to ensuring its proper functioning and reliability. Any defects or malfunctions should be promptly addressed to prevent accidents or inaccurate test results.
4. Worksite Safety
Before commencing testing activities, technicians should assess the worksite for potential hazards and implement appropriate safety measures. This may include securing the testing area, cordoning off hazardous zones, and providing clear signage to alert others to the presence of testing equipment.
5. Communication and Coordination
Effective communication and coordination among team members are vital for ensuring safety during ultrasonic testing operations. Clear instructions should be provided, and everyone involved should be aware of their roles and responsibilities to minimize the risk of accidents or misunderstandings.
6. Emergency Preparedness
Technicians should be trained in emergency procedures and equipped with emergency response kits to handle unexpected situations such as equipment malfunctions, injuries, or chemical spills effectively. Regular drills and simulations can help ensure a prompt and coordinated response in cases of emergencies.
By prioritizing safety and implementing these measures, technicians can minimize the risks associated with ultrasonic testing and ensure a safe working environment for all personnel involved.
Conclusion
Ultrasonic testing is a powerful tool for detecting flaws and ensuring the integrity of materials and components across a wide range of industries. Utilizing the principles of sound wave propagation, this non-destructive testing method gives useful information about the internal structure of materials, allowing defects to be found and fixed quickly.
As technology continues to evolve, ultrasonic testing is poised to remain at the forefront of quality assurance and risk management strategies, contributing to safer, more reliable products and infrastructure. NDT Products is known for delivering top-notch non-destructive testing solutions that exceed industry standards. With an extensive range of high-quality products and unmatched expertise, we cater to the diverse needs of clients across various sectors, from aerospace and automotive to oil and gas.
Ultrasonic testing is particularly effective for homogeneous materials such as metals and composites but may have limitations when testing highly attenuative or porous materials.
Phased array ultrasonics give you more control over the beam steering and focusing, which makes it easier to find and describe defects in complex shapes.
Technicians should regularly inspect and maintain ultrasonic testing equipment to ensure its proper functioning and reliability. Any defects or malfunctions should be promptly addressed to prevent accidents or inaccurate test results.